A collaborative project between artists Holly Hendon and Mat Dryhurst: ‘The Call’ uses AI to merge recordings of 15 community choirs into...
A step-by-step guide to help you video a performance using everyday equipment
1. Consider what to capture
You could be videoing complete with audio or perhaps you want to focus on just the visuals of a performance to contribute to a larger project. Consider the following for your own project:
Video with audio
- minimal editing required after performance
- you will usually need to perform the piece in one take
- you will need to compromise between audio quality and video framing when positioning your recording device
Video without audio
- no pressure to perform a perfect take
- you will still need to keep in time with the piece's accompanying audio recording
- you can be creative with camera angles, without the worry of compromising on audio quality
2. Select a device
Most smartphones, tablets and home computers come with an inbuilt video camera
Apple Mac
- to locate apps click the magnifying glass icon (top right hand corner of screen) and search for the app
- the 'Photo Booth' app allows video recording
- launch the app, select the video function - icon with a film strip logo found in the bottom left of the app
Windows PC
- to locate apps click 'Start' and search for the app
- the 'Camera' app allows video recording
- launch the app, select the video function - icon with a film camera logo found on right side of app
Android device
- the 'Camera' app
- select video function within app
Apple IOS device
- the 'Camera' app
- select video function within app
3. Choose your location
The location's audio and visual qualities will have a huge impact on your video
Audio
- avoid recording with background noise
- avoid rooms with hard floors and surfaces
- use cushions or pillows to dampen the room's natural reverberation
Visual
- use a well-lit location with plenty of natural light
- avoid having a window or light source behind you
- try not to make the shot too busy - avoid lots of distractions around and behind the subject
4. Frame your shot
Here are some tips to simply frame your shot to get a professional result
Portrait or landscape?
In most situations we recommend videoing in landscape, if using a smartphone or tablet rotate the device to achieve this
Framing
Using a device with an inbuilt camera and microphone means that you need to compromise to get both a good shot and a good quality audio recording of your voice or instrument, below are some framing examples and recommendations for different sized instruments
Smaller instruments
- centrally position the subject in the frame
- frame the shot closer in, considering the instrument and the musician's face
Larger instruments
- centrally position the subject in the frame
- make sure you can fit both the instrument and player within the shot
Pianos
- position the device toward the centre of the instrument
- if safe to do so experiment with fixing the camera above the player showing a birds-eye-view
- alternatively the camera could face the player, or face towards the player's back and the keyboard
- avoid placing your device directly onto the piano
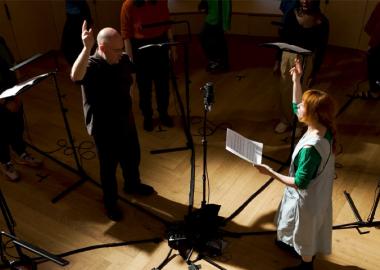
Vocalists
- centrally position the subject in the frame
- the focus of this shot is the head, so frame the subject's head and upper part of the body
5. Prepare your device
Quality
If your device allows, set the video and audio recording settings to the highest quality available
Silent
Switch any devices in the recording location to 'silent' or 'do not disturb' settings
Unplug
For smartphones and tablets, unplug headphones and chargers
Backing track
Use a separate device (with headphones) if you need to play along to a backing or click track
Case
Remove device cases as they may muffle the inbuilt microphone
6. Do a test
Experiment
Have a play with your device and see how it works, both whilst recording and playing back
Adjust
After making a test recording consider adjusting the camera or your own position to improve the shot
7. The recording
Are the numbers rolling?
Most recording devices display the duration of recording in minutes and seconds, always check that the numbers are counting before starting to perform your piece
Announcement
It's sometimes handy to say your name, the piece's title and recording date at the beginning of the recording
5 seconds
Wait 5 seconds after starting a recording to begin your performance and do the same at the end
before stopping the recording
8. Collaboration
If your video is to be part of a group's performance your Musical Director or the project's video producer may ask you to do the following:
Play to a click or backing track
This is to ensure everybody keeps to the exact same timing, making it possible for all the video contributions to be edited together
Clap
You may be asked to clap your hands (in front of the camera) at a precise moment before you start playing the piece, this allows the video editor to easily synchronise all the separate parts
Record audio and video on separate occasions
Some groups may choose to record audio and video on separate occasions allowing the project to include the best possible microphone placement for audio whilst also framing the video as each member chooses
We hope you find this Making Music resource useful. If you have any comments or suggestions about the guidance please contact us. Whilst every effort is made to ensure that the content of this guidance is accurate and up to date, Making Music do not warrant, nor accept any liability or responsibility for the completeness or accuracy of the content, or for any loss which may arise from reliance on the information contained in it.